
Apache Maven 設定方法
目次
Mavenとは?
Apache Maven
Maven:専門家、達人
プロジェクト管理ツール
Antの後継
Mavenを利用してビルドする場合、Mavenのコマンドでプロジェクトのスケルトン(雛形)を作る。
1. ライブラリ自動インストーラ
POMで定義したライブラリをプロジェクトに自動インストールする。
ライブラリのCVS管理が不要になる。
ダウンロード手順(自動)
1) リモートリポジトリからローカルリポジトリにダウンロード
Mavenセントラルリポジトリ(http://search.maven.org/)からダウンロードされる
2) プロジェクトからローカルリポジトリを参照
2. ビルドツール
内部でAntを使用
build.xmlは不要
3. デプロイ
4. Eclipse、Jenkinsとの連動
Eclipseにおけるビルドパスの自動設定
Jenkinsからのビルド
設定
インストール
1. ApacheMavenサイトから最新バージョン(投稿時点で3.3.9)をダウンロード
2. 圧縮ファイルを解凍(apache-maven-3.3.9)
3. フォルダを任意の場所へ移動(例 D:\Program Files\Apache Software Foundation)
4. 環境変数設定
M2_HOME=D:\~\apache-maven-3.3.9
PATH=%M2_HOME%\bin
MAVEN_OPTS="~"
Maven実行時のオプション指定
MAVEN_OPTS="
プロキシ設定
-Dhttps.proxyHost=http://proxy.example.com
-Dhttps.proxyPort=8080
-Dhttps.proxyUser=username
-Dhttps.proxyPassword=pass
-Dhttps.nonProxyHosts=localhost|127.0.0.1"
Maven実行時のメモリ使用量設定
MAVEN_OPTS="
-Xmx2048M"
5. settings.xmlを%USERPROFILE%\.m2 フォルダーに配置
.m2 フォルダーがない場合は、コマンドプロンプトで作成(mkdir)
%USERPROFILE%はC:\Users\~
例) C:\Users\米良太\.m2
settings.xml
Maven実行時の基本設定
<?xml
version="1.0"
encoding="UTF-8"?>
<settings
xmlns="http://maven.apache.org/SETTINGS/1.1.0"
xmlns:xsi="http://www.w3.org/2001/XMLSchema-instance"
xsi:schemaLocation="
http://maven.apache.org/SETTINGS/1.1.0
http://maven.apache.org/xsd/settings-1.1.0.xsd">
ローカルリポジトリ
コンパイルや実行時の参照場所
ダウンロードするライブラリもここに保存される。
<localRepository>
C:/Users/xxx/.m2/repository
</localRepository>
サーバー設定
ダウンロードやデプロイを外部から行う際の認証情報等
<servers>
<server>
<id>server001</id>
<username>(ユーザー名)</username>
<password>(パスワード)</password>
<privateKey>${user.home}/.ssh/id_dsa</privateKey>
<passphrase>some_passphrase</passphrase>
<filePermissions>664</filePermissions>
<directoryPermissions>775</directoryPermissions>
<configuration></configuration>
</server>
</servers>
プロキシ設定
ネットワーク環境がプロキシを利用している場合
<proxies>
<proxy>
<id>http_proxy</id>
<active>true</active>
<protocol>http</protocol>
<host>proxy.example.com</host>
<port>8080</port>
<username>username</username>
<password>password</password>
<nonProxyHosts>localhost|127.0.0.1</nonProxyHosts>
</proxy>
</proxies>
</settings>
POM
Project Object Model
pom.xml
<project
xmlns="http://maven.apache.org/POM/4.0.0"
xmlns:xsi="http://www.w3.org/2001/XMLSchema-instance"
xsi:schemaLocation="
http://maven.apache.org/POM/4.0.0
http://maven.apache.org/maven-v4_0_0.xsd">
<modelVersion>4.0.0</modelVersion>
他のプロジェクトと重複不可
<groupId>com.example</groupId>
=プロジェクト名(他と重複不可)
<artifactId>sample</artifactId>
package実行時のファイル形式(jar/war/zip等)
<packaging>jar</packaging>
<version>1.0-SNAPSHOT</version>
アプリケーション名(他と重複可)
<name>Maven Quick Start Archetype</name>
<url>http://maven.apache.org</url>
依存関係
リポジトリから自動的にダウンロードされる
<dependencies>
「dependency」参照
</dependencies>
<profiles>
<profile>
プロファイルID
<id>profileA</id>
プロファイルが有効になる条件
<activation>
未指定時に有効
<activeByDefault>true</activeByDefault>
JDKが合致する場合に有効
<jdk>1.6</jdk>
<file>
ファイルが有る場合に有効
<exists>/dirA/dirB/fileC</exists>
ファイルが無い場合に有効
<missing>/dirA/dirB/fileC</missing>
</file>
</activation>
プログラムから利用する値
<properties>
<value1>999<value1>
<value2>AAA<value2>
</properties>
</profile>
<profile>
<id>profileB</id>
~
</profile
</profiles>
</project>
dependency
依存関係
ライブラリに無い場合、リポジトリから自動的にダウンロードして追加する
<dependencies>
MavenでのJUnitテスト実行ライブラリ
<dependency>
<groupId>junit</groupId>
<artifactId>junit</artifactId>
<version>3.8.1</version>
<scope>test</scope>
</dependency>
</dependencies>
通常、http://search.maven.org からpom.xmlに設定されたgroupId、artifactIdを検索する
ライブラリの検索方法
①検索欄にライブラリ情報を入力して検索実行
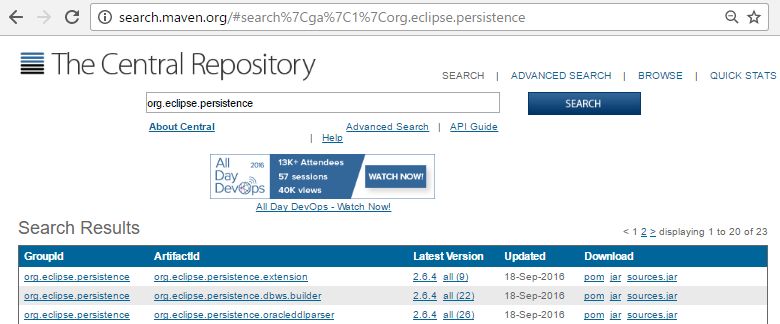
②バージョンをクリック
③「Dependency Information」欄をコピー
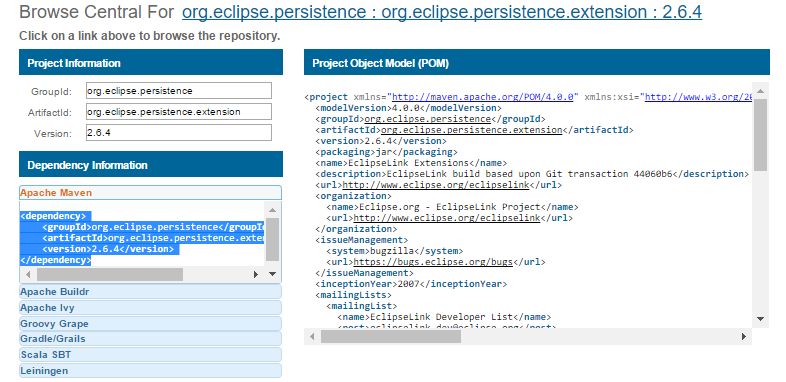
④pom.xmlに追加
<dependency>
<groupId>org.eclipse.persistence</groupId>
<artifactId>org.eclipse.persistence.extension</artifactId>
<version>2.6.4</version>
</dependency>
repository
ダウンロード先
dependencyで設定したライブラリがセントラルリポジトリに無い場合のダウンロード先
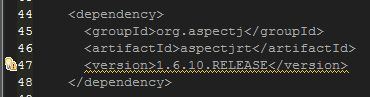
※pom.xml
<dependency>
<groupId>org.aspectj</groupId>
<artifactId>aspectjrt</artifactId>
<version>1.6.10.RELEASE</version>
</dependency>
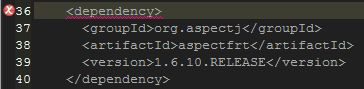
ライブラリが無いというエラーが表示される
Missing artifact org.aspectj:aspectfrt:jar:1.6.10.RELEASE
Mavenコマンドに失敗する
> mvn package
[ERROR] Failed to execute goal on project myId: Could not resolve dependencies for project lib:myId:war:0.0.1-SNAPSHOT: Failure to find org.aspectj:aspectfrt:jar:1.6.10.RELEASE in https://repo.maven.apache.org/maven2 was cached in the local repository, resolution will not be reattempted until the update interval of central has elapsed or updates are forced -> [Help 1]
セントラルリポジトリ(https://repo.maven.apache.org/maven2)には無いというエラー
※pom.xml
リポジトリ情報を追加
<repositories>
<repository>
<id>spring.org</id>
<name>spring foundation repository</name>
<url>http://repo.spring.io/release/</url>
</repository>
</repositories>
スプリング用リポジトリ(http://repo.spring.io/release/)

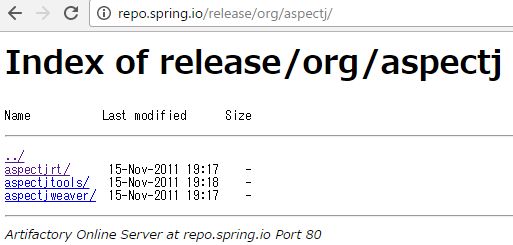
aspectjrtという名前のライブラリがある
mvnコマンド実行
> mvn install
プロジェクト
└src
└~
└target
└myId-0.0.1-SNAPSHOT
└WEB-INF
└lib
└aspectjrt-1.6.10.RELEASE.jar
└pom.xml
ダウンロードされている
エラーが解消されている
maven-jar-plugin
※pom.xml
<build>
<plugins>
<plugin>
<groupId>org.apache.maven.plugins</groupId>
<artifactId>maven-jar-plugin</artifactId>
<version>2.5</version>
<configuration>
<archive>
「JAVA 重要用語/マニフェストファイル」参照
<manifest>
MANIFEST.MFに「Start-Class」を出力
※「java -jar」コマンドを使ってJARファイルを実行する場合
<mainClass>com.office.yone.Test</mainClass>
MANIFEST.MF ファイルに Class-Path 要素を追加
<addClasspath>true</addClasspath>
</manifest>
<manifestEntries>
MANIFEST.MF「Class-Path」に出力
<Class-Path>./</Class-Path>
</manifestEntries>
</archive>
</configuration>
</plugin>
</plugins>
</build>
※MANIFEST.MF
Manifest-Version: 1.0
Implementation-Title: Test
Implementation-Version: 0.0.1-SNAPSHOT
Archiver-Version: Plexus Archiver
Built-By: 米
Implementation-Vendor-Id: com.office.yone
Class-Path:
./
spring-boot-starter-1.5.3.RELEASE.jar
~
Spring-Boot-Version: 1.5.3.RELEASE
Implementation-Vendor: Pivotal Software, Inc.
Main-Class: org.springframework.boot.loader.JarLauncher
Start-Class: com.office.yone.Test
Spring-Boot-Classes: BOOT-INF/classes/
Spring-Boot-Lib: BOOT-INF/lib/
Created-By: Apache Maven 3.5.0
Build-Jdk: 1.8.0_121
parent/modules
親子プロジェクト用
※フォルダ構成
親プロジェクト
└pom.xml
└子プロジェクトA
└pom.xml
└子プロジェクトB
└pom.xml
※pom.xml(親プロジェクト)
<project>
<modelVersion>4.0.0</modelVersion>
<groupId>com.example</groupId>
<artifactId>parent</artifactId>
<version>1.0-SNAPSHOT</version>
<modules>
<module>A</module>
<module>B</module>
</modules>
</project>
※子プロジェクトA
<project>
<parent>
<groupId>com.example</groupId>
<artifactId>parent</artifactId>
<version>1.0-SNAPSHOT</version>
</parent>
<modelVersion>4.0.0</modelVersion>
<groupId>com.example</groupId>
<artifactId>A</artifactId>
<version>1.0-SNAPSHOT</version>
</project>
Eclipse
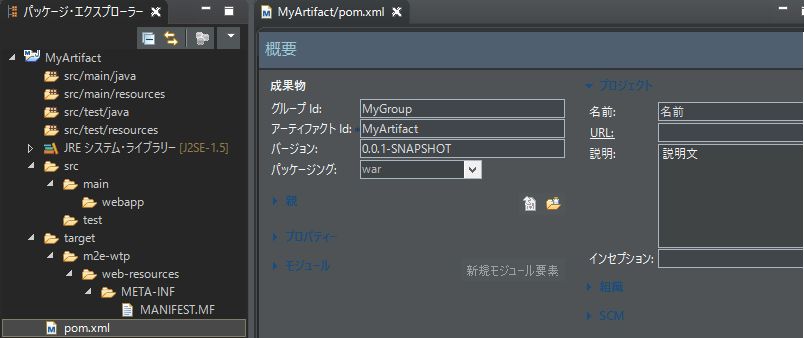
プロジェクト作成
新規 → Maven → Mavenプロジェクト → 「シンプルなプロジェクトの作成」をチェック →
↓ を入力 → 完成

作成後
設定
ウィンドウ → 設定 → JAVA → ビルドパス → クラスパス変数 → 新規
M2_REPO=%USERPROFILE%\.m2\repository
例) C:\Users\米良太\.m2\repository
ウィンドウ → 設定 → 実行/デバッグ → ストリング置換 → 新規
名前:maven_exec
値:{Mavenルート}\bin\mvn.bat
例) D:\Program Files\Apache Software Foundation\apache-maven-3.3.9\bin\mvn.bat
実行 → 外部ツール → 外部ツールの構成
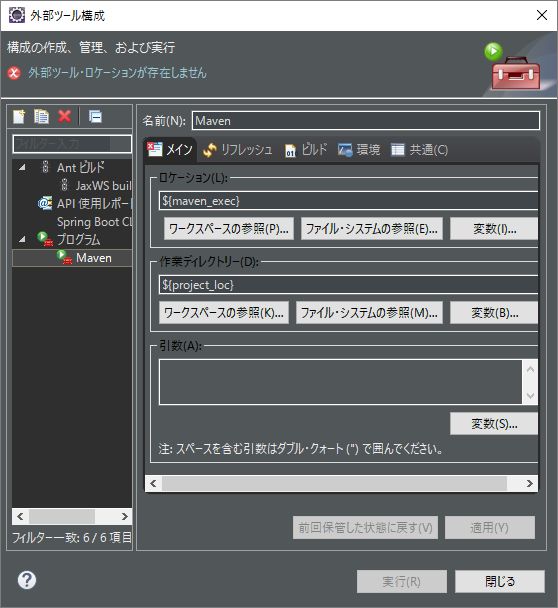
プログラム → 新規
ロケーション:${maven_exec}
作業ディレクトリ:${project_loc}
Mavenコマンドの実行
上記「設定」を設定後に実行